It’s been a crazy couple of years and I simply haven’t had time to do much crafting. But as life settles down, I have finally found the time to complete a project that I’ve been wanting to do for over 2 years!

My inspiration for this project
This birthday board post from Sugar Bee Crafts was one of the very first things I ever Pinned on Pinterest. I’ve gone back over and over and looked and it and thought to myself “one day”.
Well that day finally came! A quick trip to Michael’s later (let’s be honest, no trip to Michael’s is quick), I had almost all of the supplies I needed. I couldn’t decide exactly how I was going to attached the pieces together so I picked up the eye hooks and earrings from Walmart.

After prepping my work area I started by applying a coat of the chalk paint to the board.
While I let it dry, I drew a line through the centre of each disk and measured 2 holes, one top and one bottom, equal distance apart.
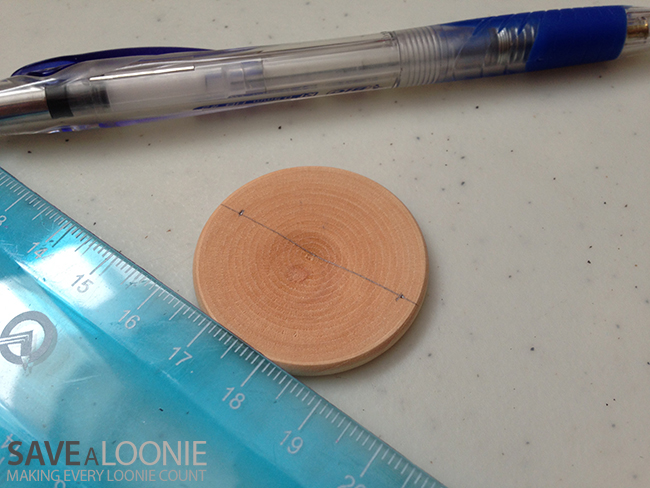
Make sure you do this for each birthday you will be adding to the board. It’s time consuming but essential for a uniform look and to ensure they all hang straight!
Next, I used a scrap piece of wood as a backing and drilled holes through each of my markings.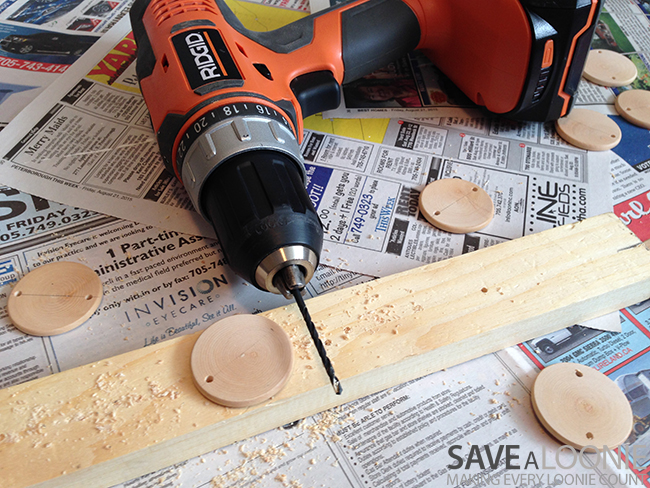
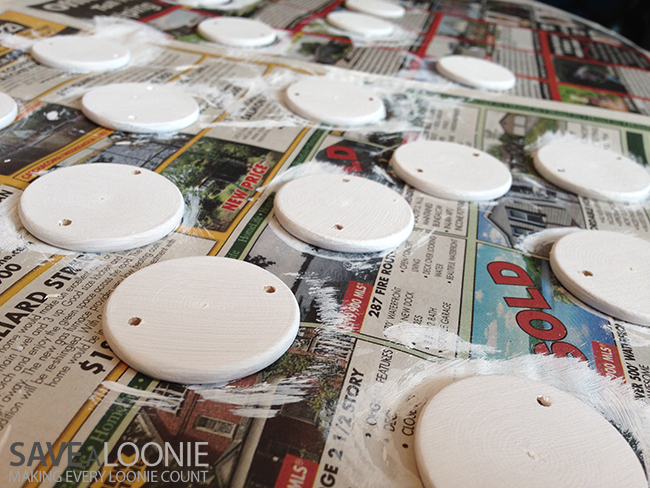
By this point, my first coat of paint on the board had dried and I was ready for coat number 2. I also used this time to paint each of my disc with the same white chalk paint.
You could always mix it up by using alternating colours for boys & girls or adults and children or by month. There are so many possibilities!
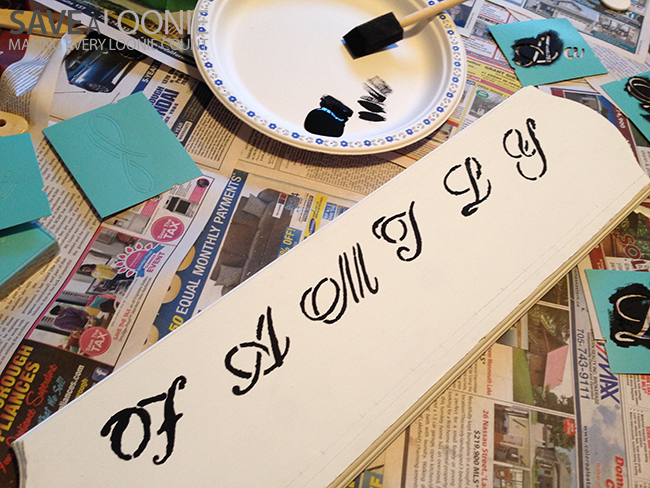
 After everything had dried, it was time to stencil on the board. This part did not go so well.
Like I said, it’s been a long time since I’ve done any painting/crafting so my skills are little rusty and I had some paint bleed. I also noticed after painting, the the calligraphy stencil I picked for FAMILY was quite intricate and makes it a little difficult to read for some. If I were to do this again, I would probably consider using vinyl letters or stickers in place of painting with a stencil.
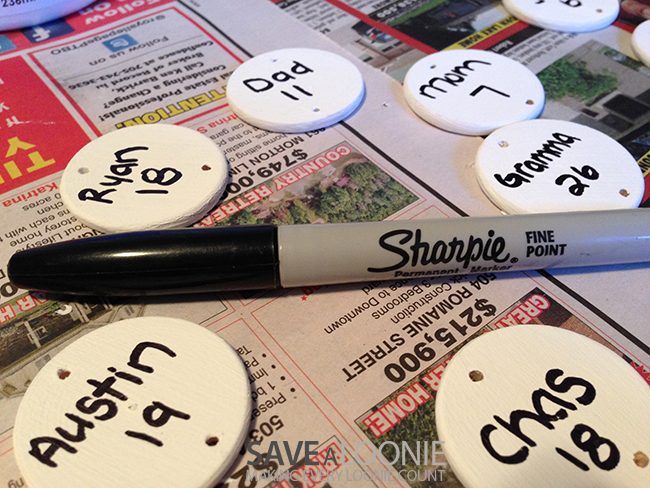
I used a black fine point Sharpie to write names and dates on each of the individual discs. I also wrote the corresponding year of birth on the back of each disc for reference (you know, just in case!). I also used the Sharpie to write the months of the year on the board.
After everything was painted, I decided it looked too “new”. I was wanting a bit more of an aged / country-chic look so I decided to stain the white. I know, I should’ve just gone with an off-white paint but then I wouldn’t have gotten to try this next part!
I soaked a tea bag (regular, ole’ Tetley) for about 5 minutes in hot water then removed it and squeezed out the majority of the water. Then, I dropped the tea bag all over the board leaving little puddles of tea.
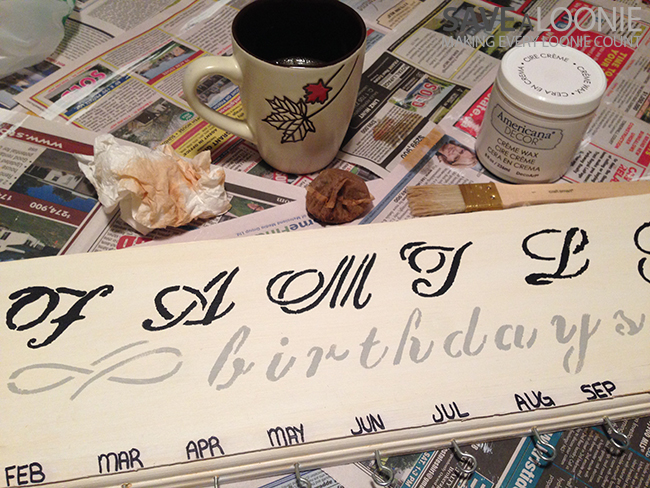
Using a paint brush and paper towel, I smeared and wiped the tea all over the board. I did the same on each disc. Once everything was dry, I sealed it with Creme Wax.
My final steps were screwing in the eye hooks for each month as well as on top for the hanging ribbon, and attaching all of the date discs together with the earrings (jewellery jump rings would also work perfect! Just don’t get the spiral rings like I did – they scratch and cause to much damage trying to install!)
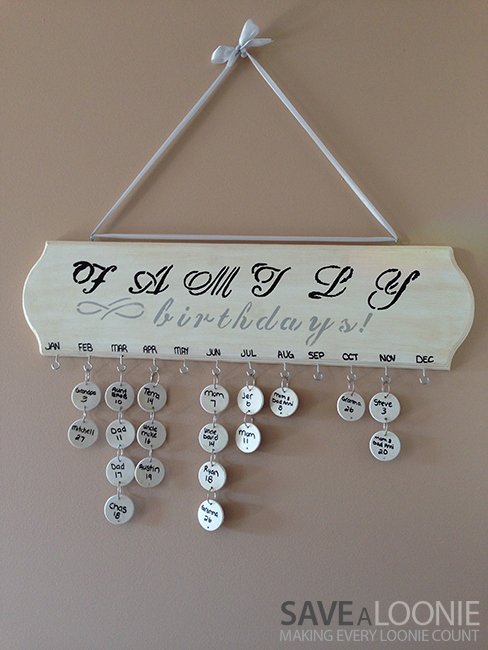
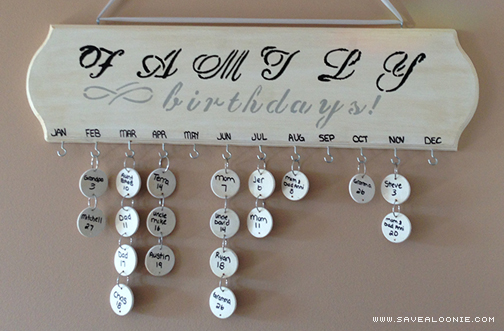
And there it is – the finished product!
While it may not be the most glorious thing, I’m really happy with the way it turned out! And now that I’ve honed my skills, I can forsee some family members getting a similar one in the coming holidays 😉